How do I schedule message visibility in the Impact Dashboard?
With message visibility scheduling you can select exactly when your messages will be visible to your users.
With message visibility scheduling you can:
- Schedule from which date/time the message will be visible
- Schedule on which date/time the message will no longer be visible
- Schedule a specific date/time range of visibility (for example 1 semester period)
Note: There are multiple factors that impact message visibility.
How do I schedule message visibility in the Impact Dashboard?
How do I schedule message visibility in the Impact Dashboard?
1. Open Messages
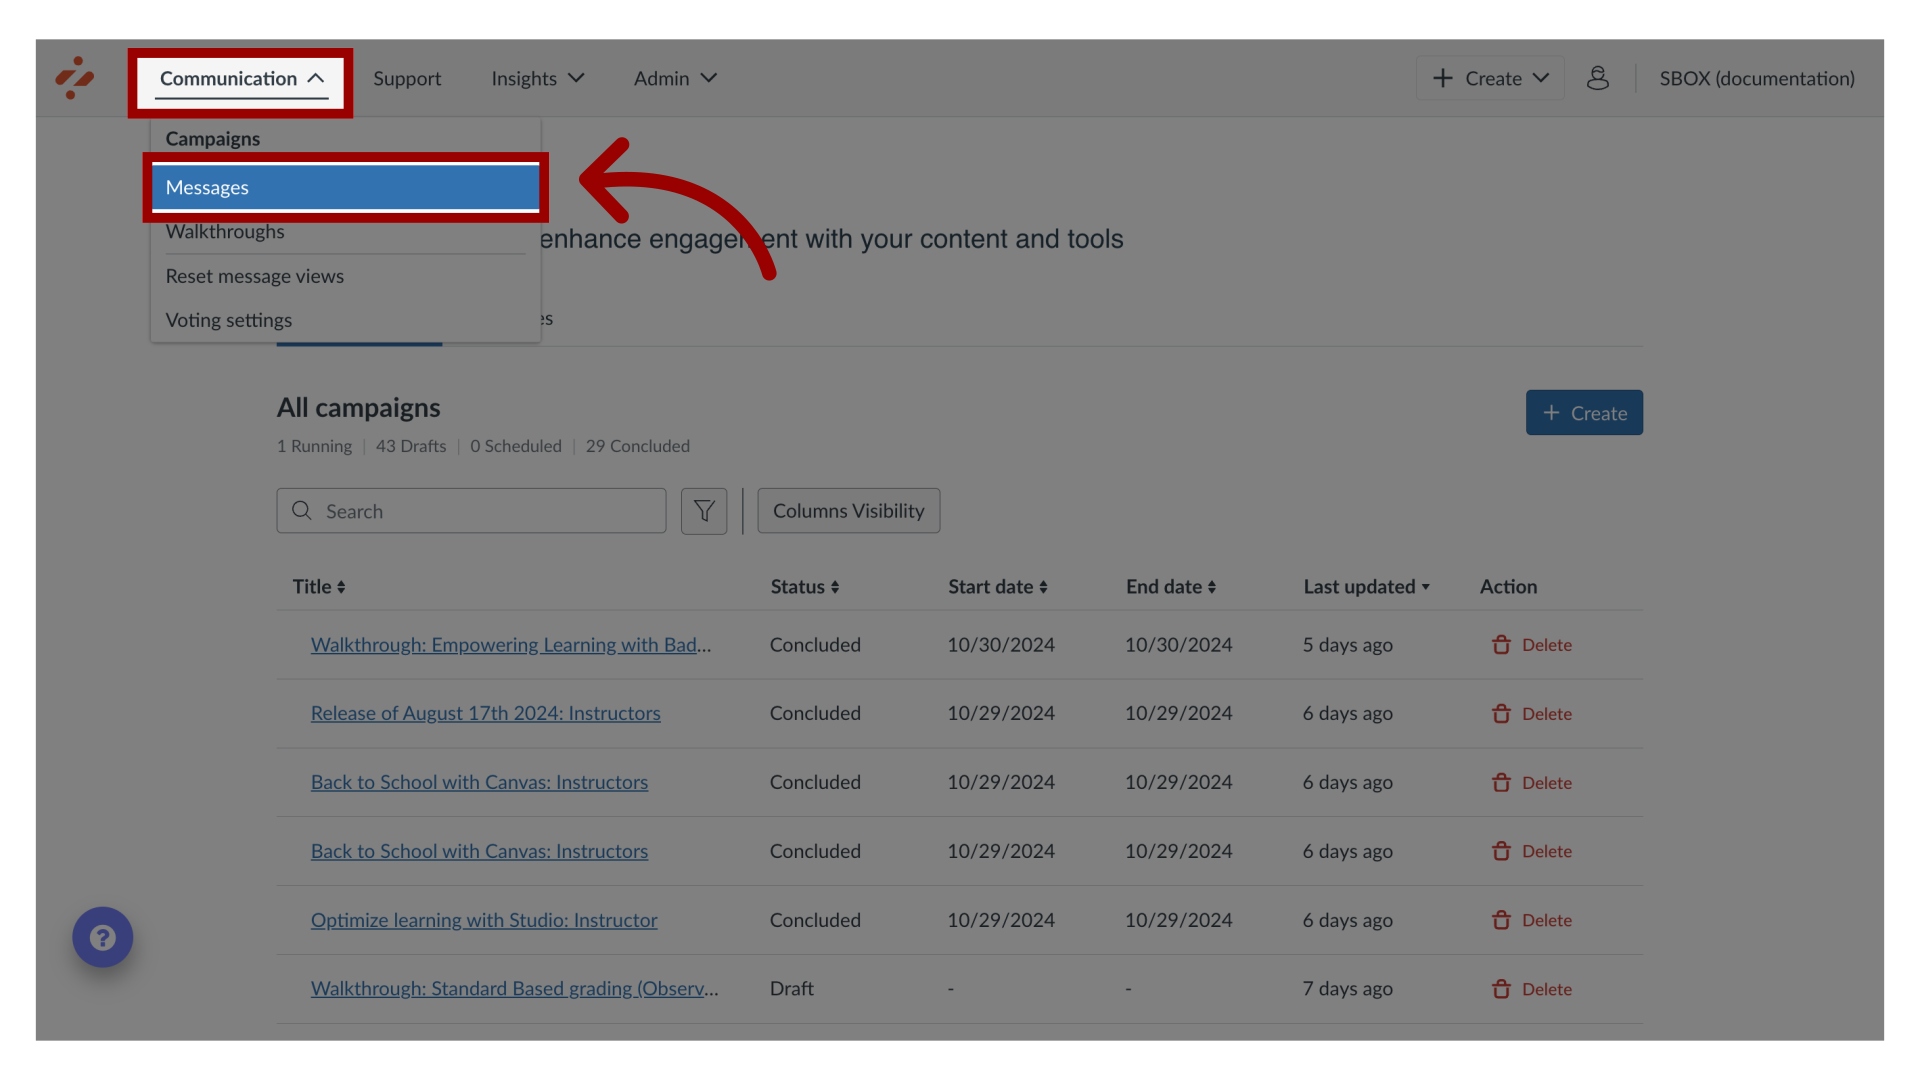
In Global Navigation, click the Communication dropdown menu. Then click the Messages link.
2. Manage Messages
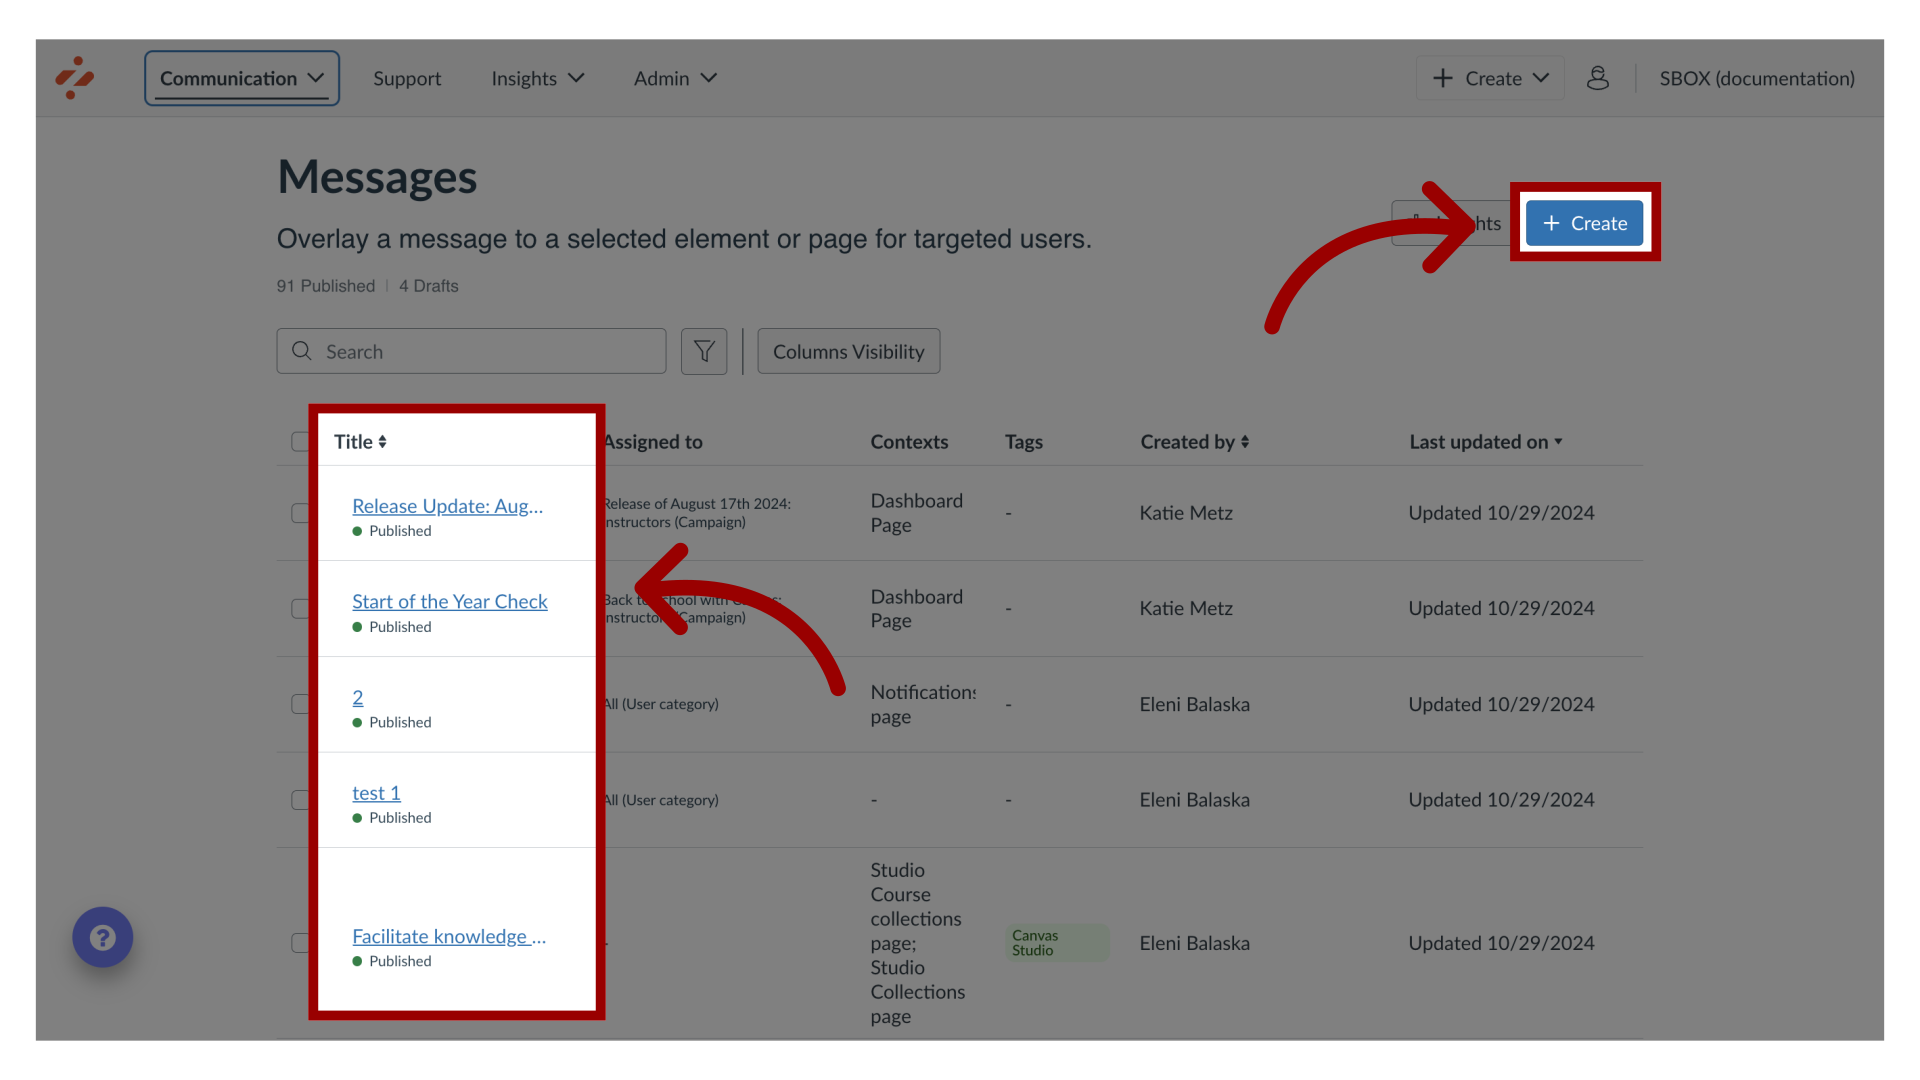
To edit an existing message, click the name of the message. To create a new item, click the Create button.
3. Edit Message
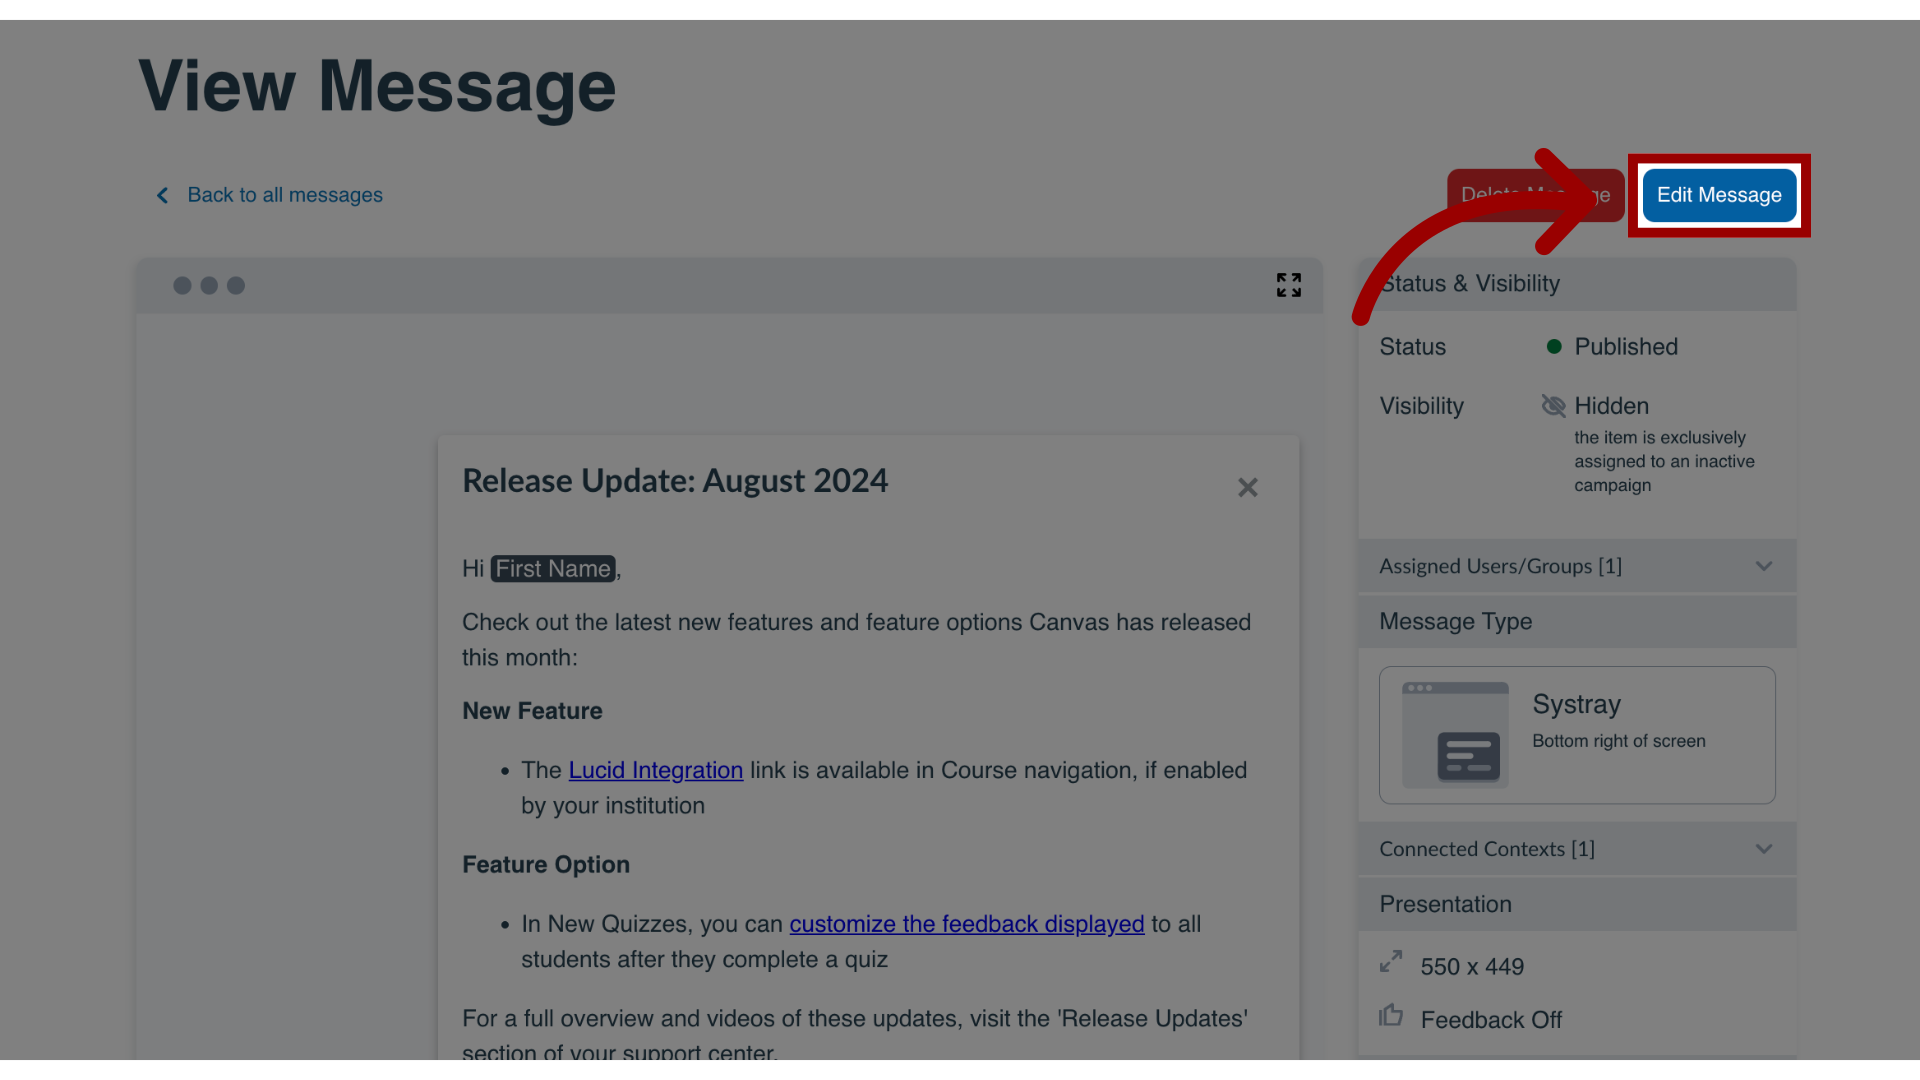
In the View Message page, click the Edit Message button. If you are creating a new message, the Edit Message button does not display.
4. Open Schedule Visibility Section
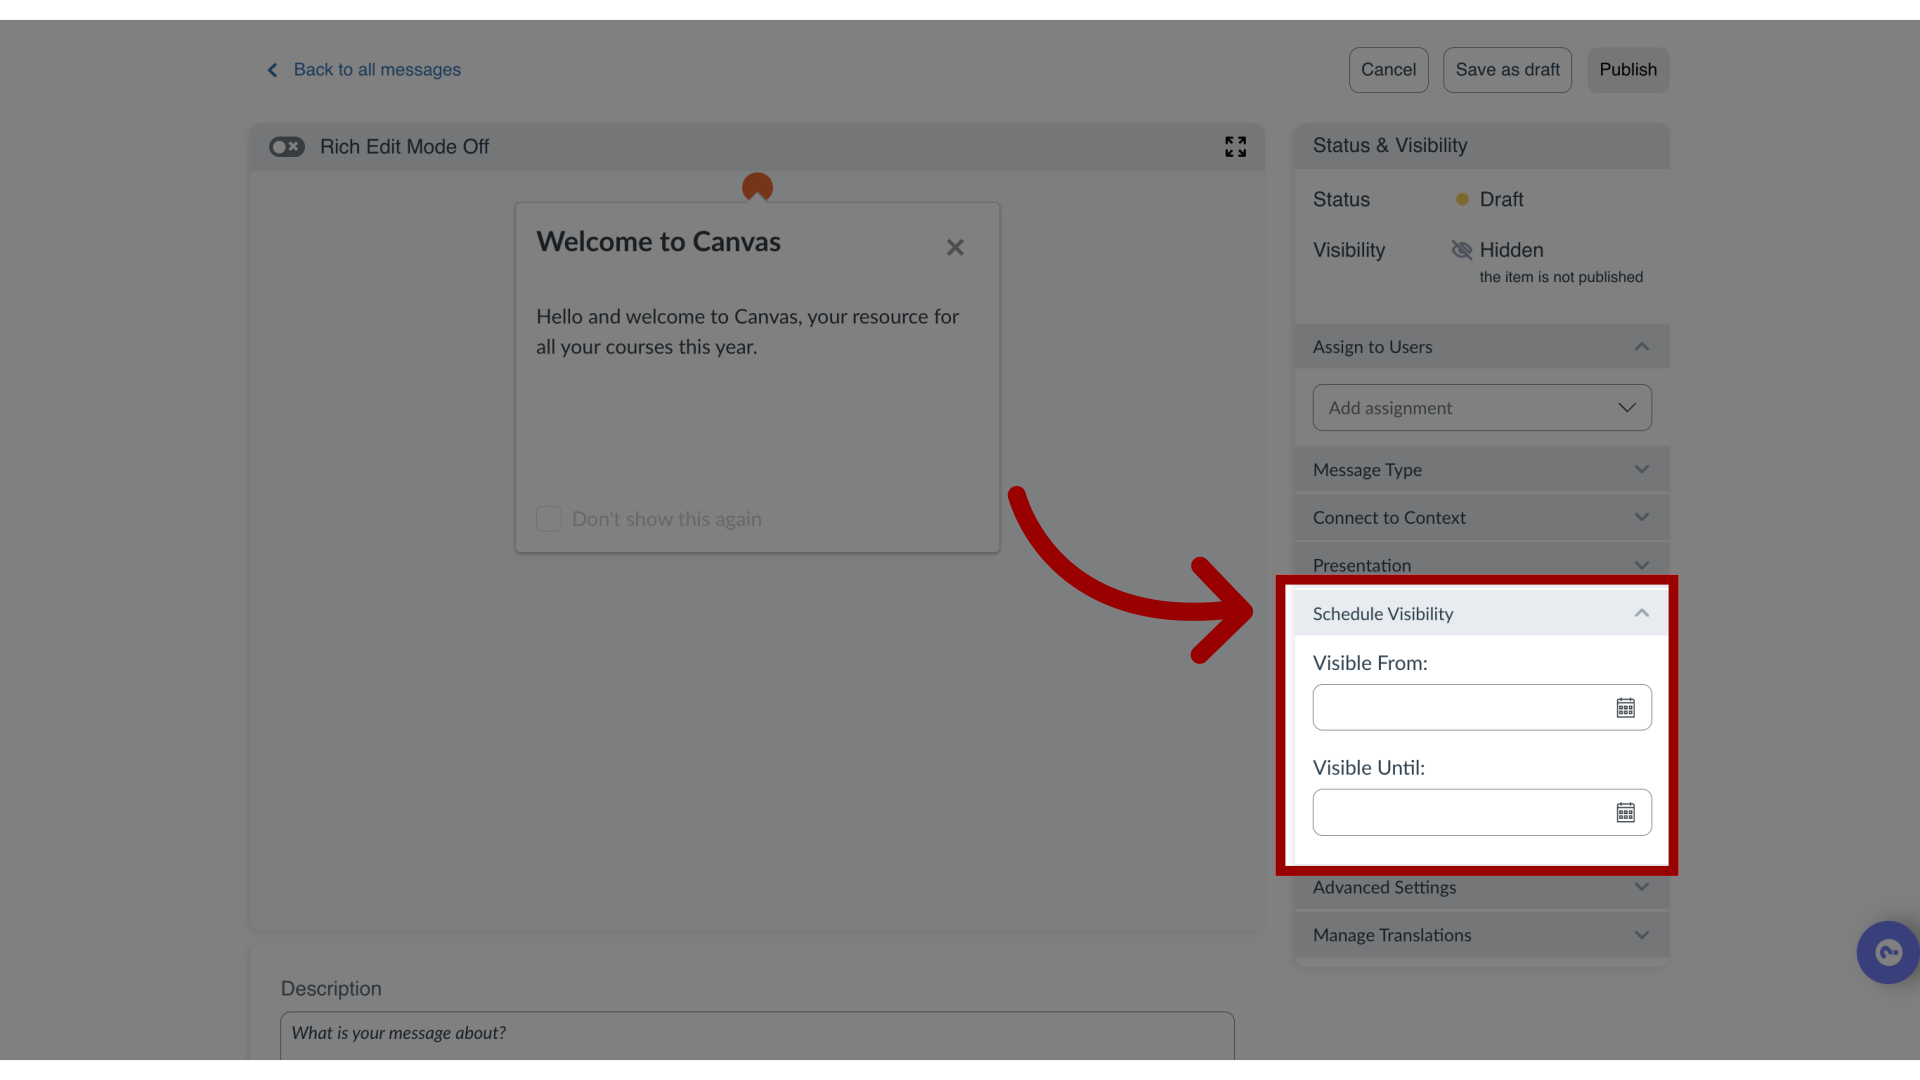
To schedule message visibility, in the sidebar, locate and open the Schedule Visibility section.
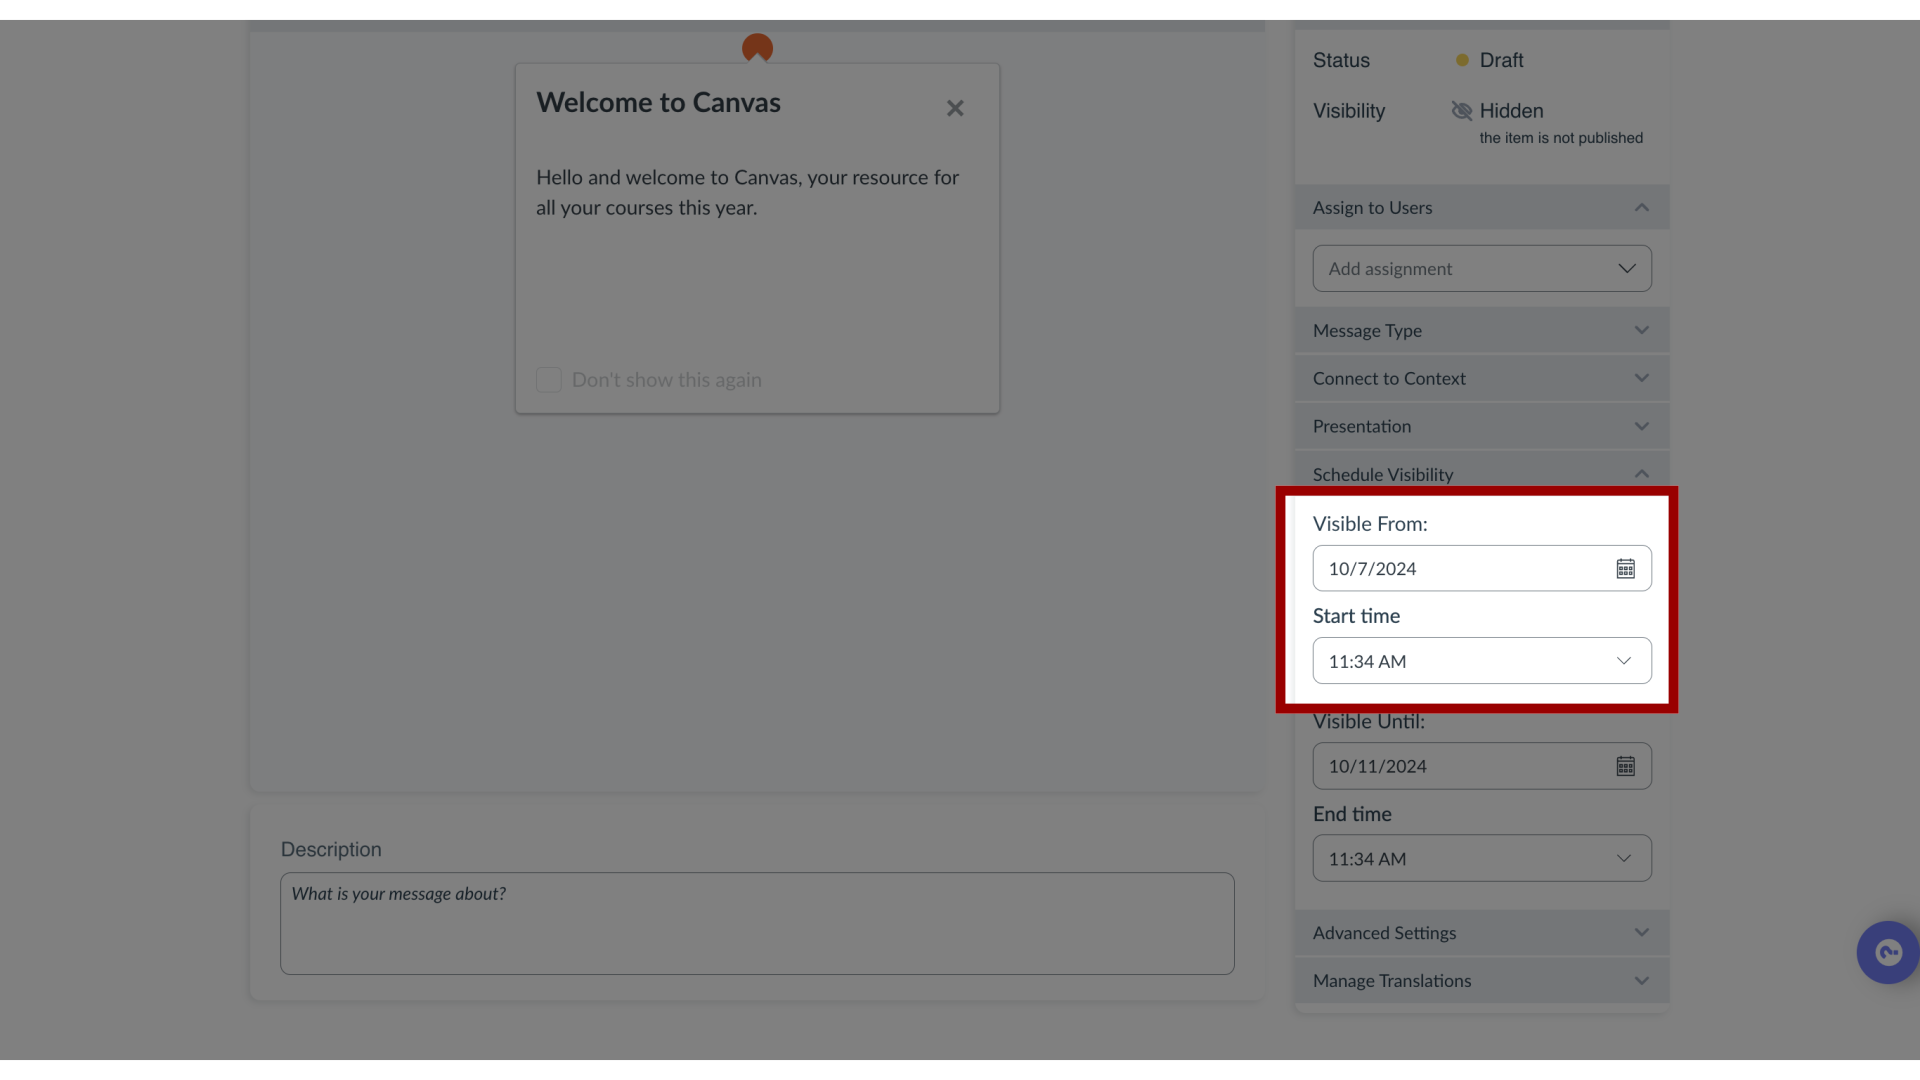
5. Set Visible From Date and Time
In the Visible From section, select the relevant Start date and Start time.
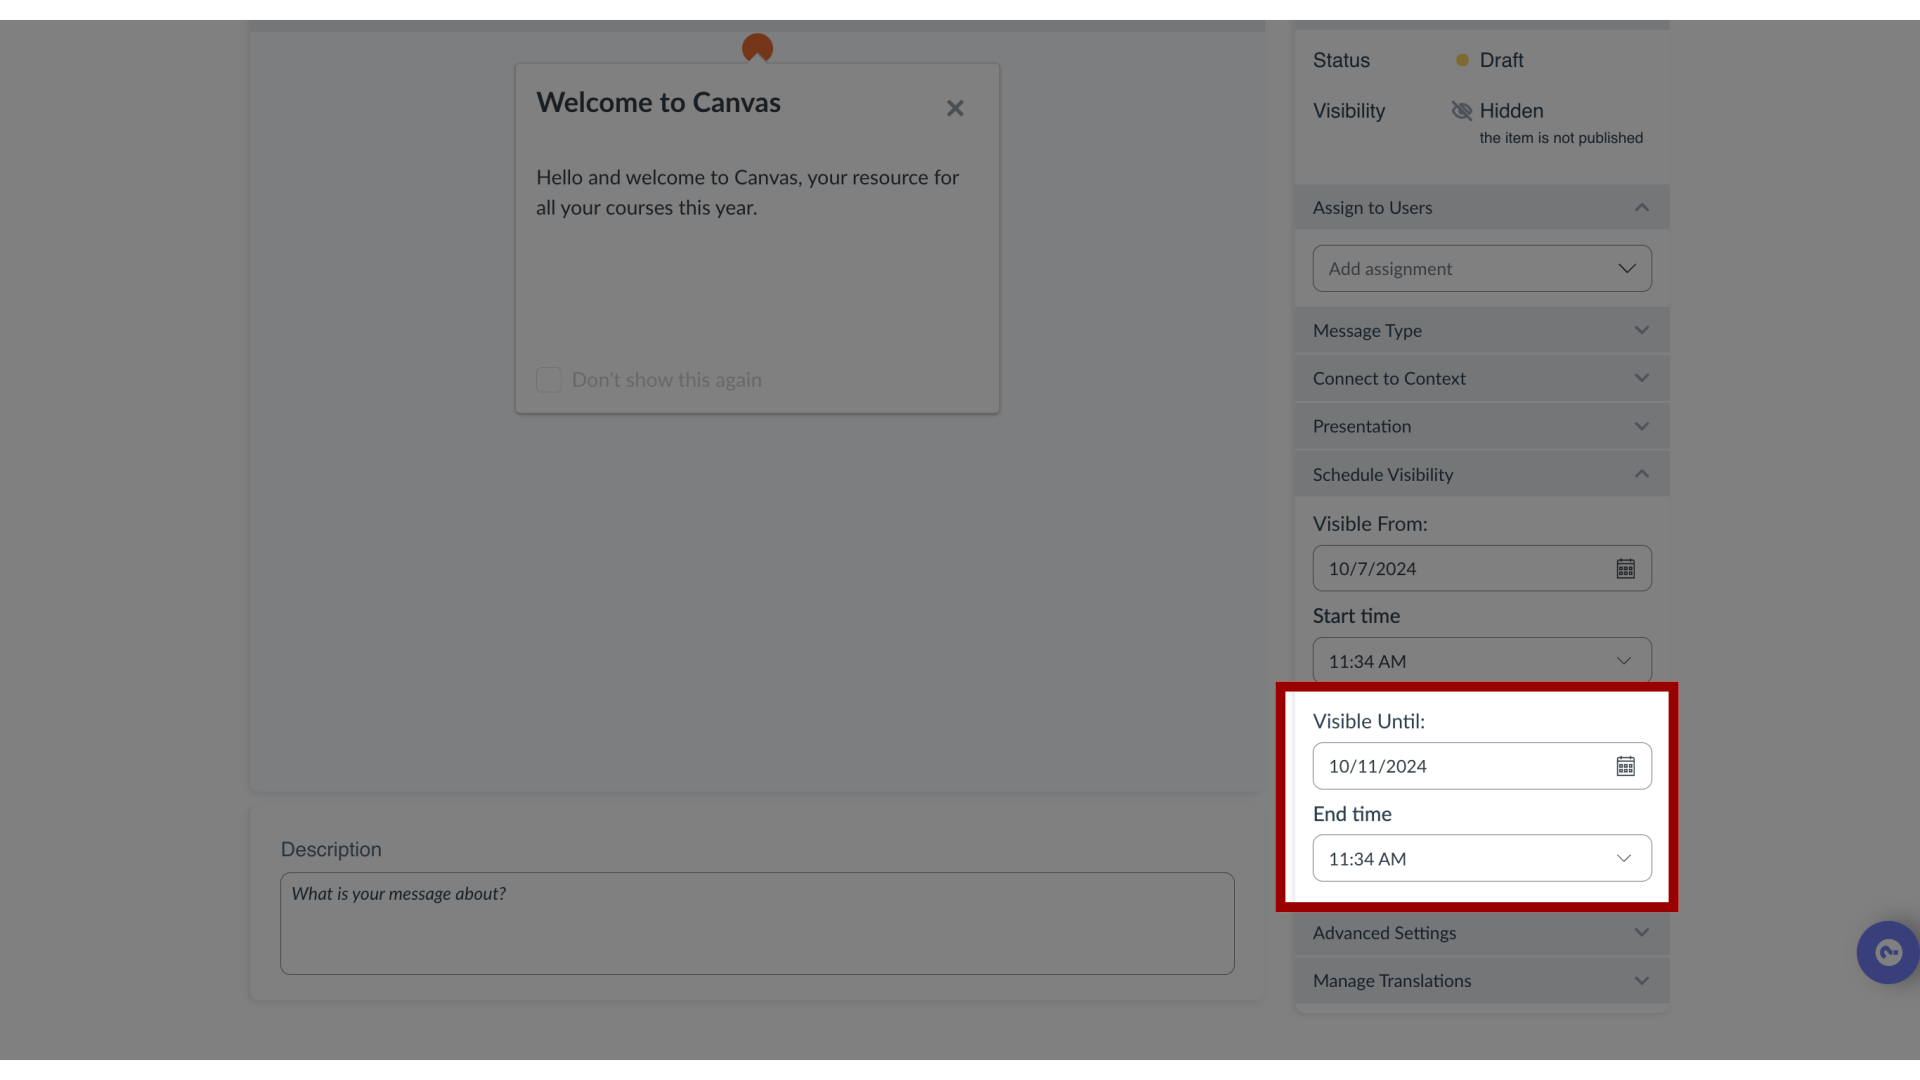
6. Set Visible Until Date and Time
In the Visible Until section, select the relevant End date and End time.
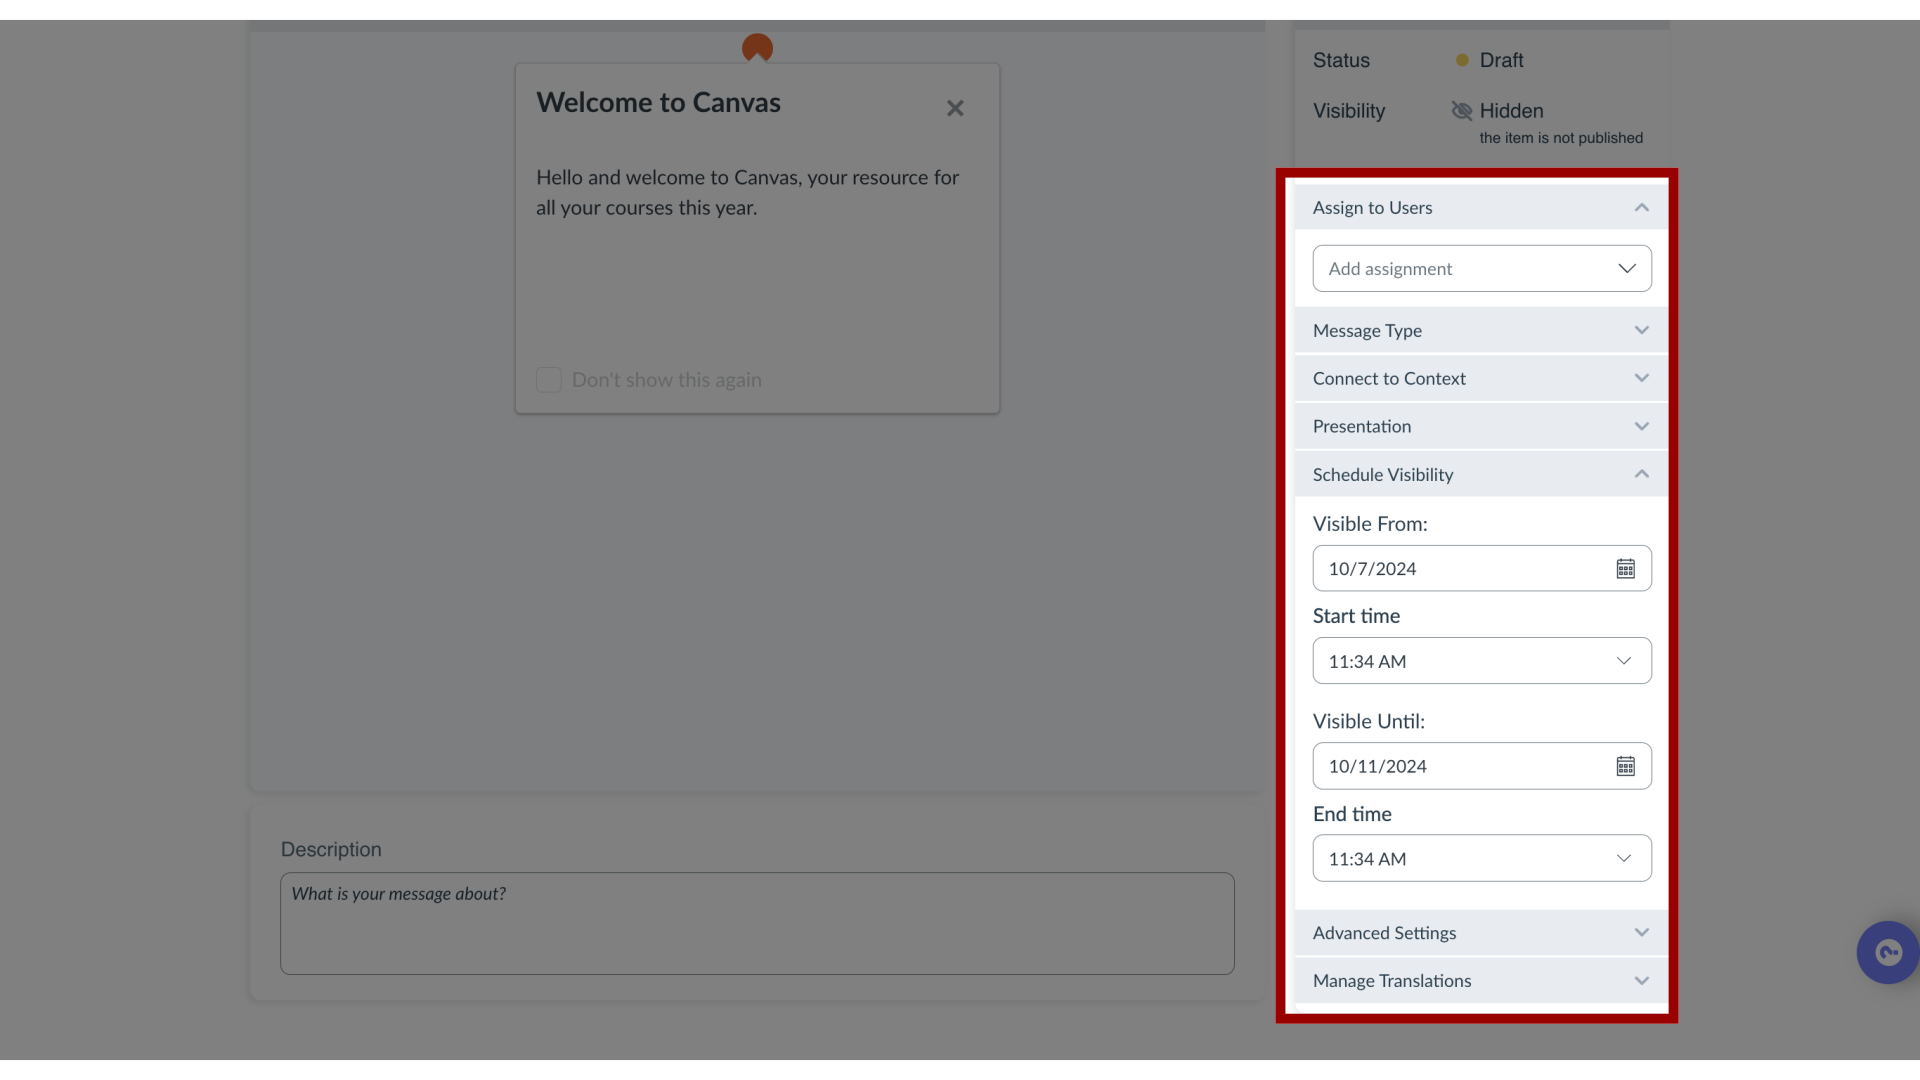
7. Check Other Settings
Ensure that no other settings are blocking your message visibility.
This guide covered how to schedule message visibility in the Impact Dashboard.
