How do I add a staff account as a Mastery Connect admin?
As a Mastery Connect admin, you can manually create a staff member user account. Every staff account must include a first and last name, an email address, and they must be associated with a school at your institution. You must also specify the user's role permissions in Mastery Connect. When you create a user account, you can also choose to include a title and an additional contact email address, and you may choose to grant additional user role permissions and specify the user's associated grade level. After the account is created, you can edit the user's account details.
Once you create a user account, the account owner must activate the account.
Notes:
- In Mastery Connect, a teacher account is any account that is neither a student nor a parent account. All staff member accounts are considered teacher accounts. However, users with a teacher account are not necessarily teachers and may have role permissions other than teacher.
- If your Mastery Connect account is configured with a student information system (SIS) integration, staff accounts are added and regularly updated via SIS sync.
- Your institution may choose to create staff accounts through CSV file upload. After a CSV file is uploaded, you can edit the accounts manually to make updates.
How do I add a staff account as a Mastery Connect admin?
How do I add a staff account as a Mastery Connect admin?
1. Open Admin
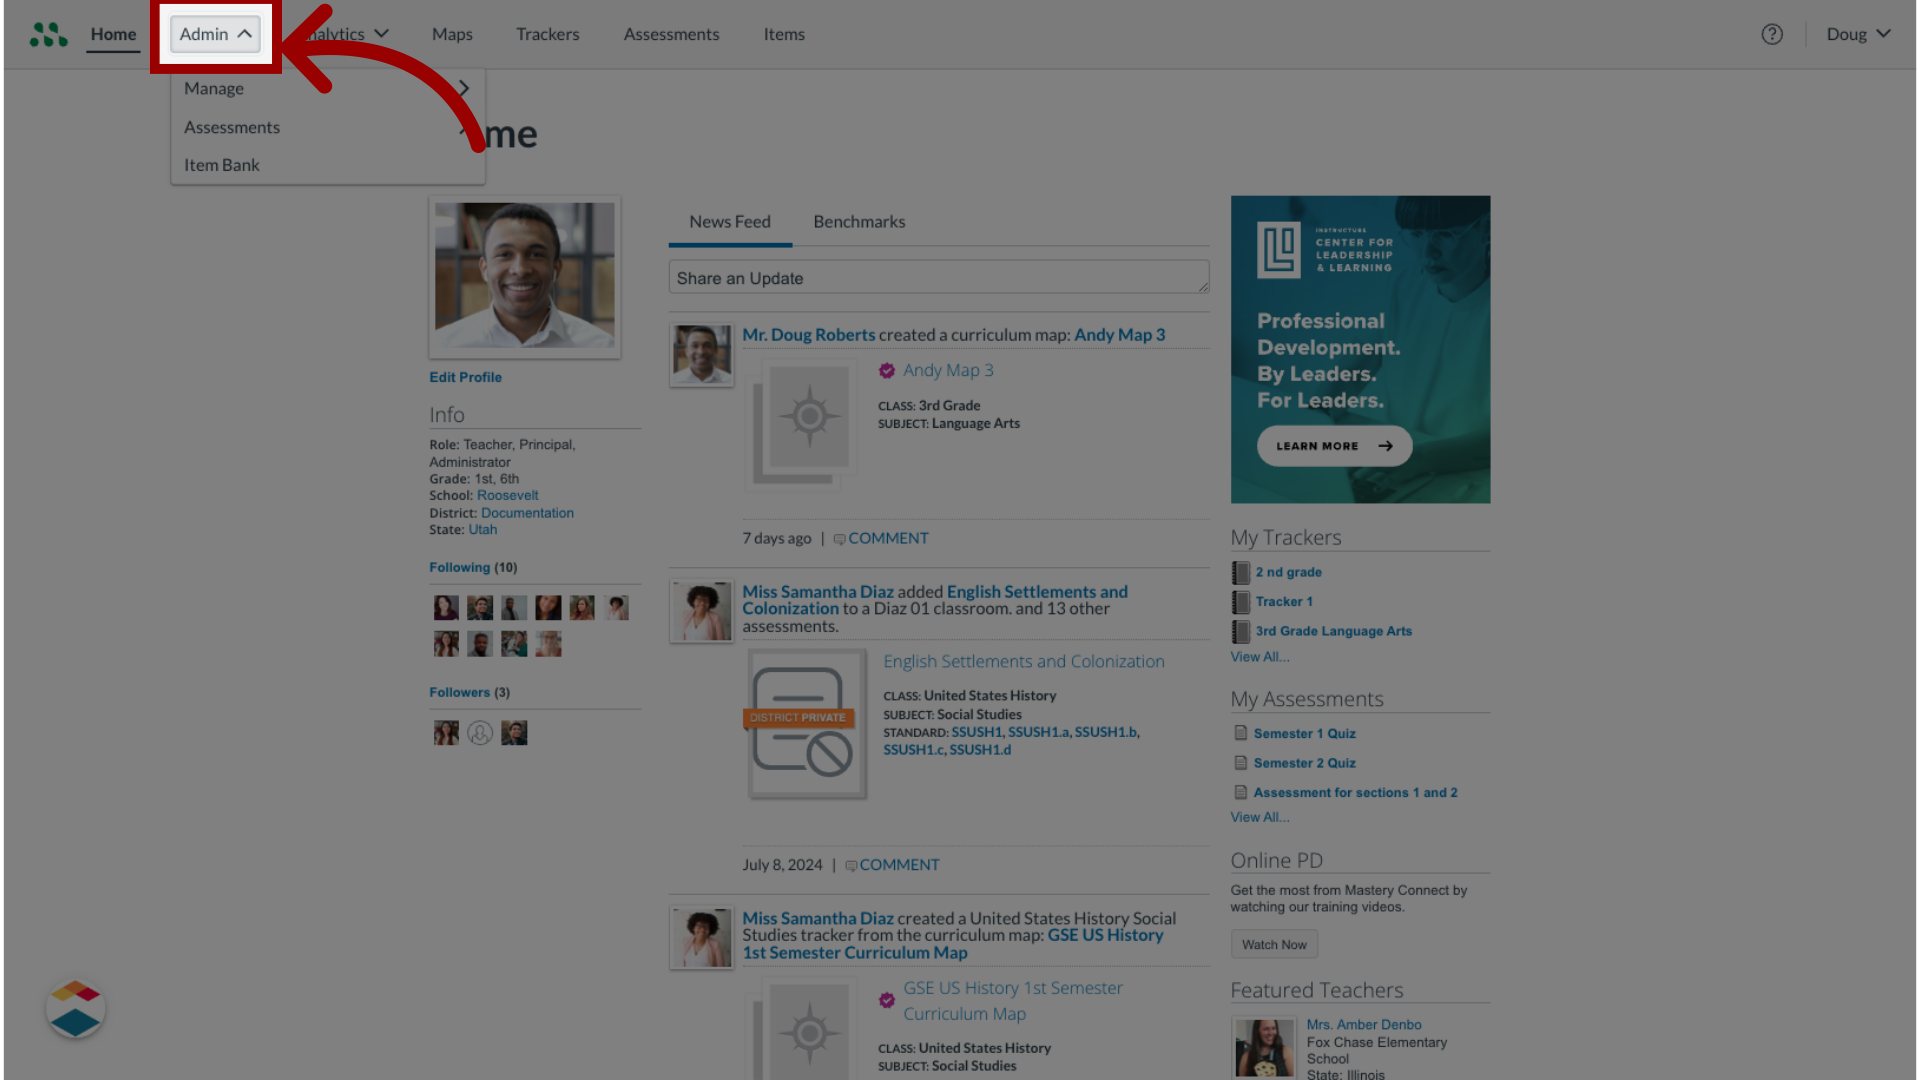
In the Global Navigation Menu, click the Admin drop-down menu.
2. Open Manage Menu
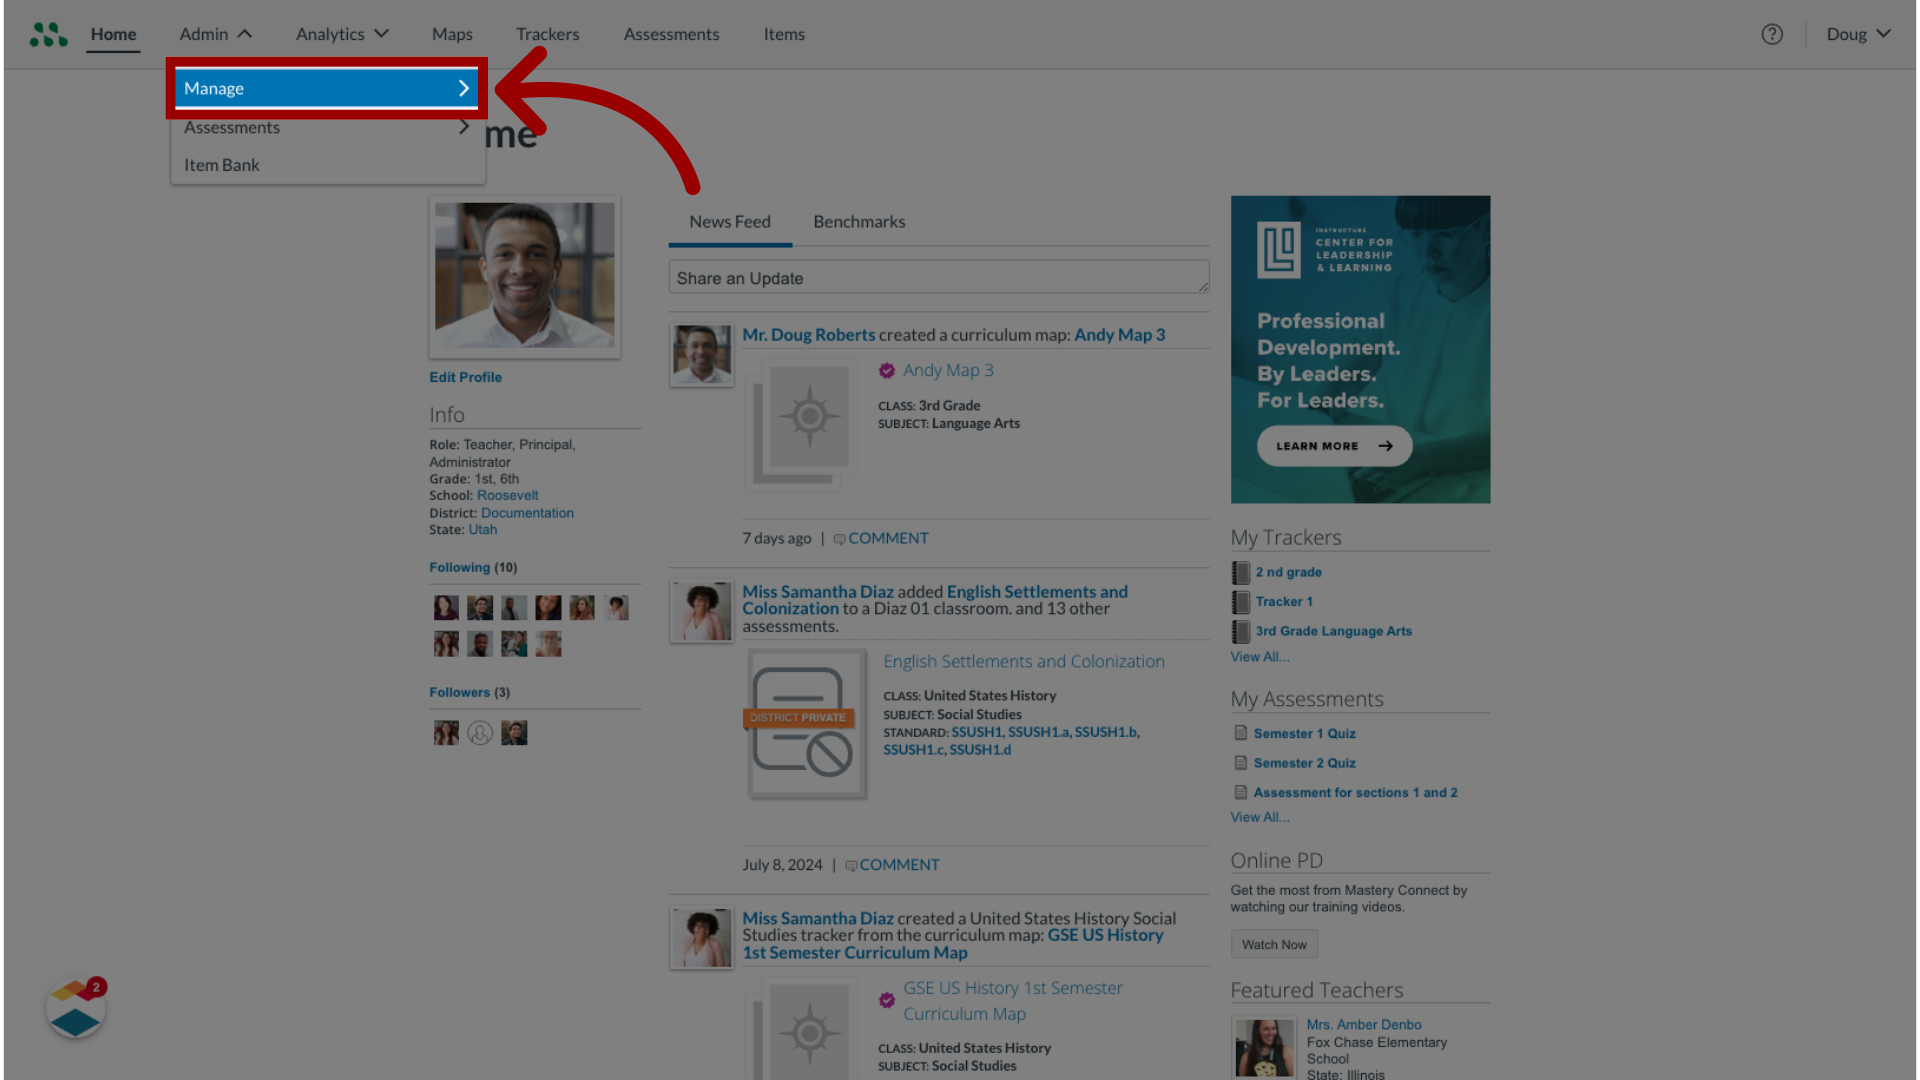
Then, click the Manage option.
3. Open Manage Teachers
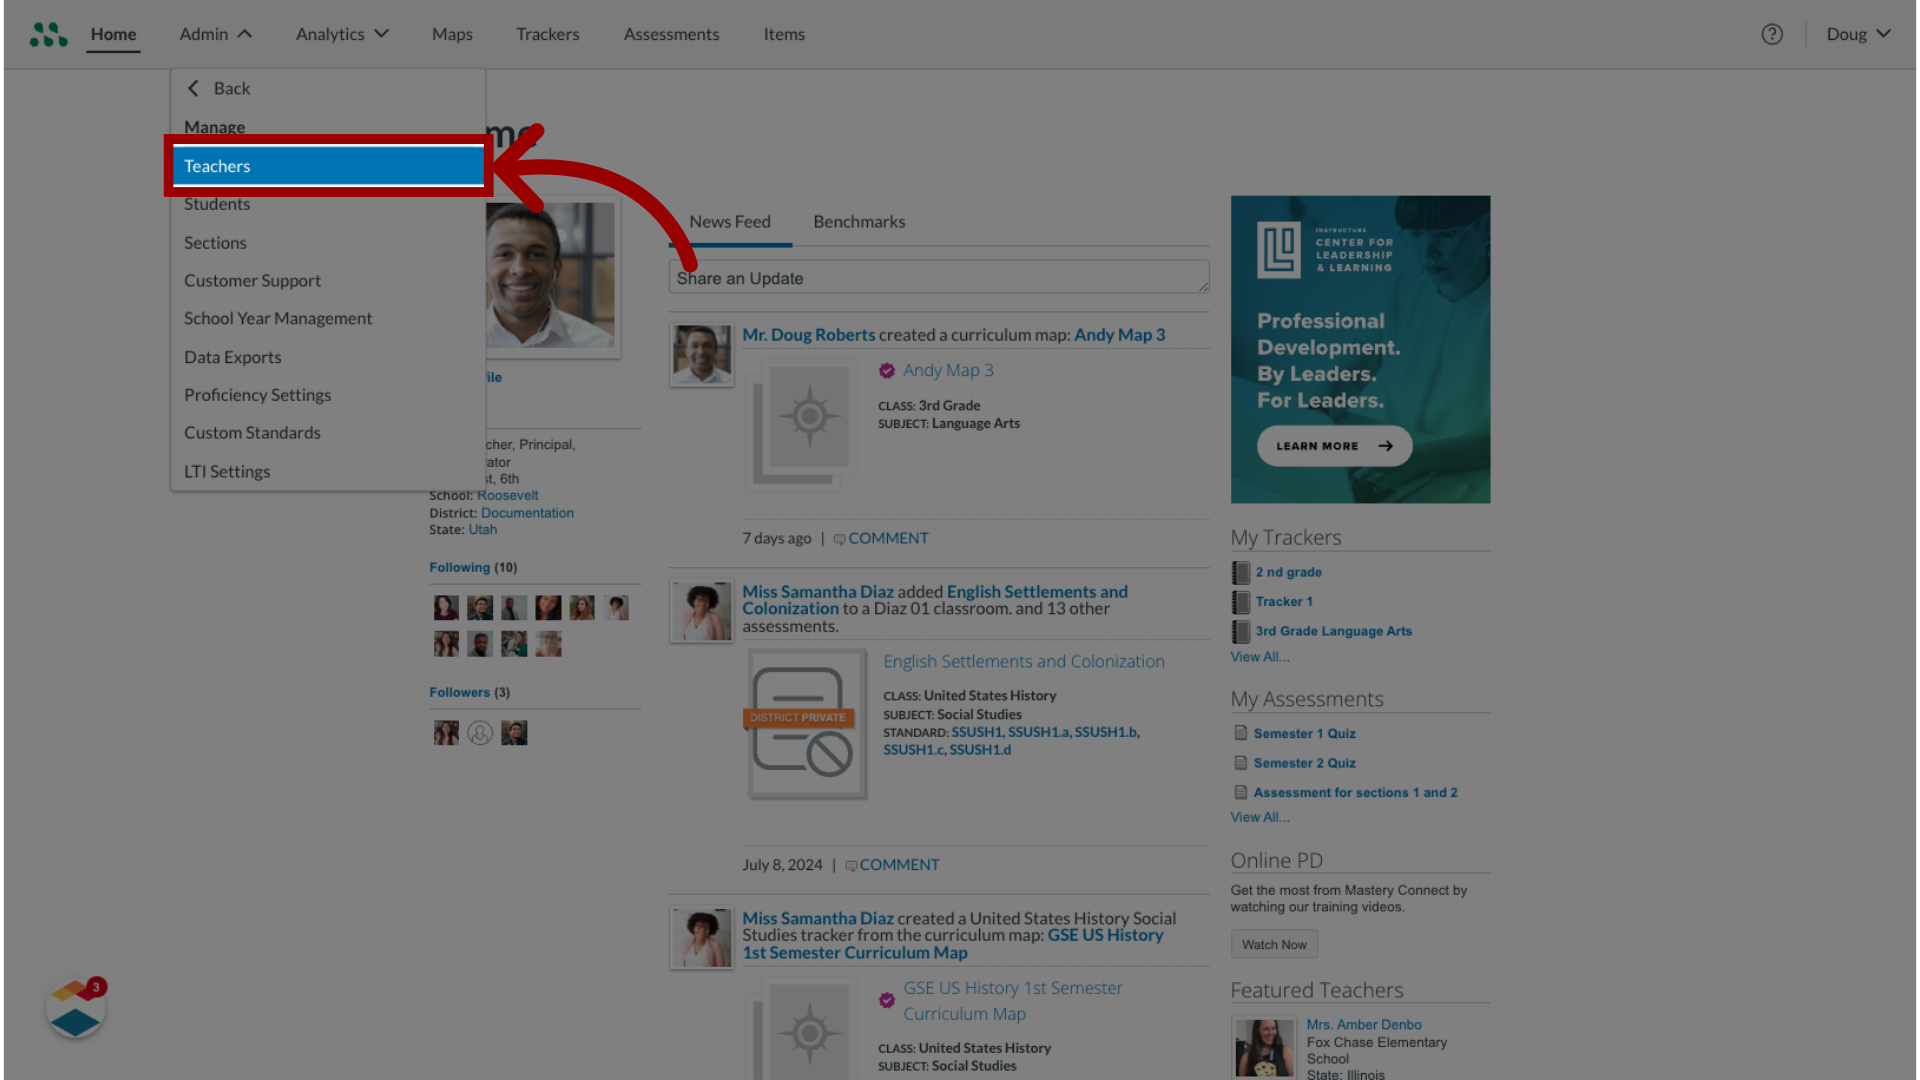
In the Manage list, click the Teachers link.
4. Create Teacher Account
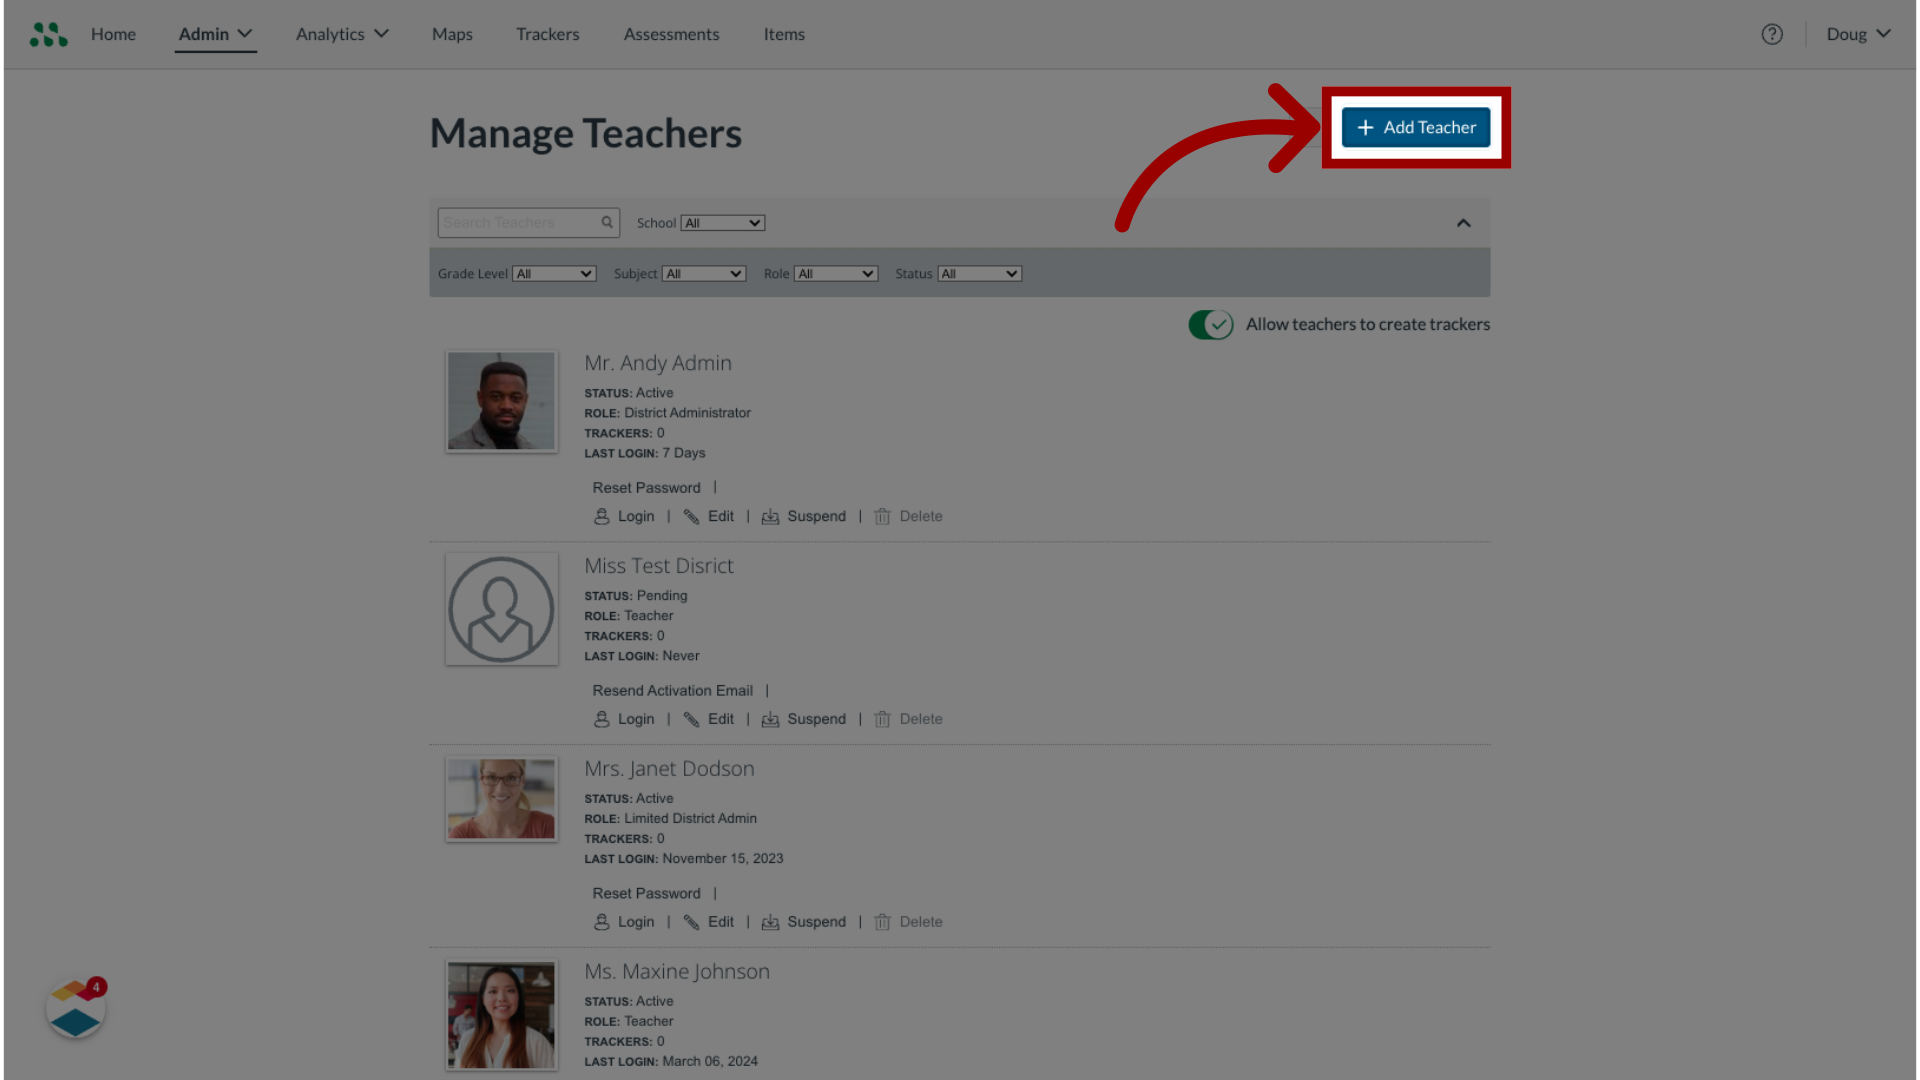
Click the Add Teacher button.
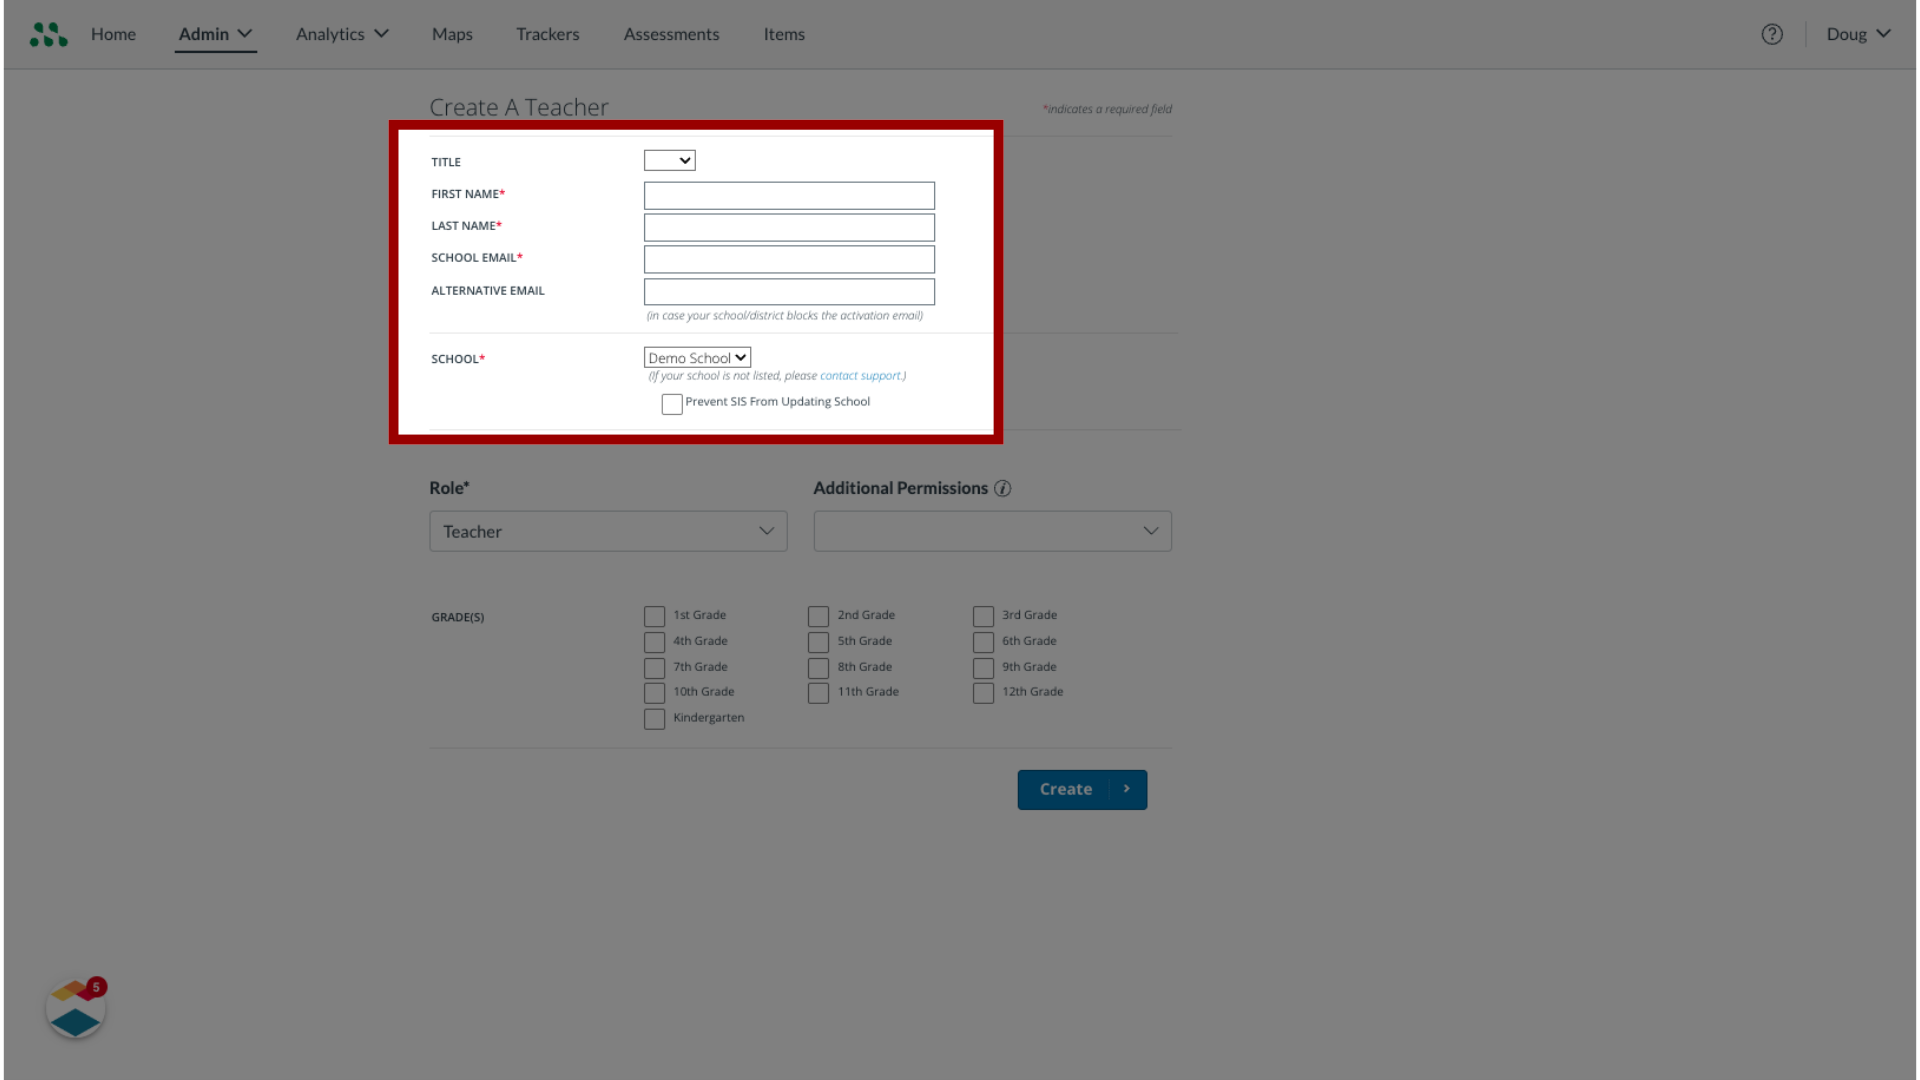
5. Enter Account Details
In the Create A Teacher page, select or enter the staff member's identifying information.
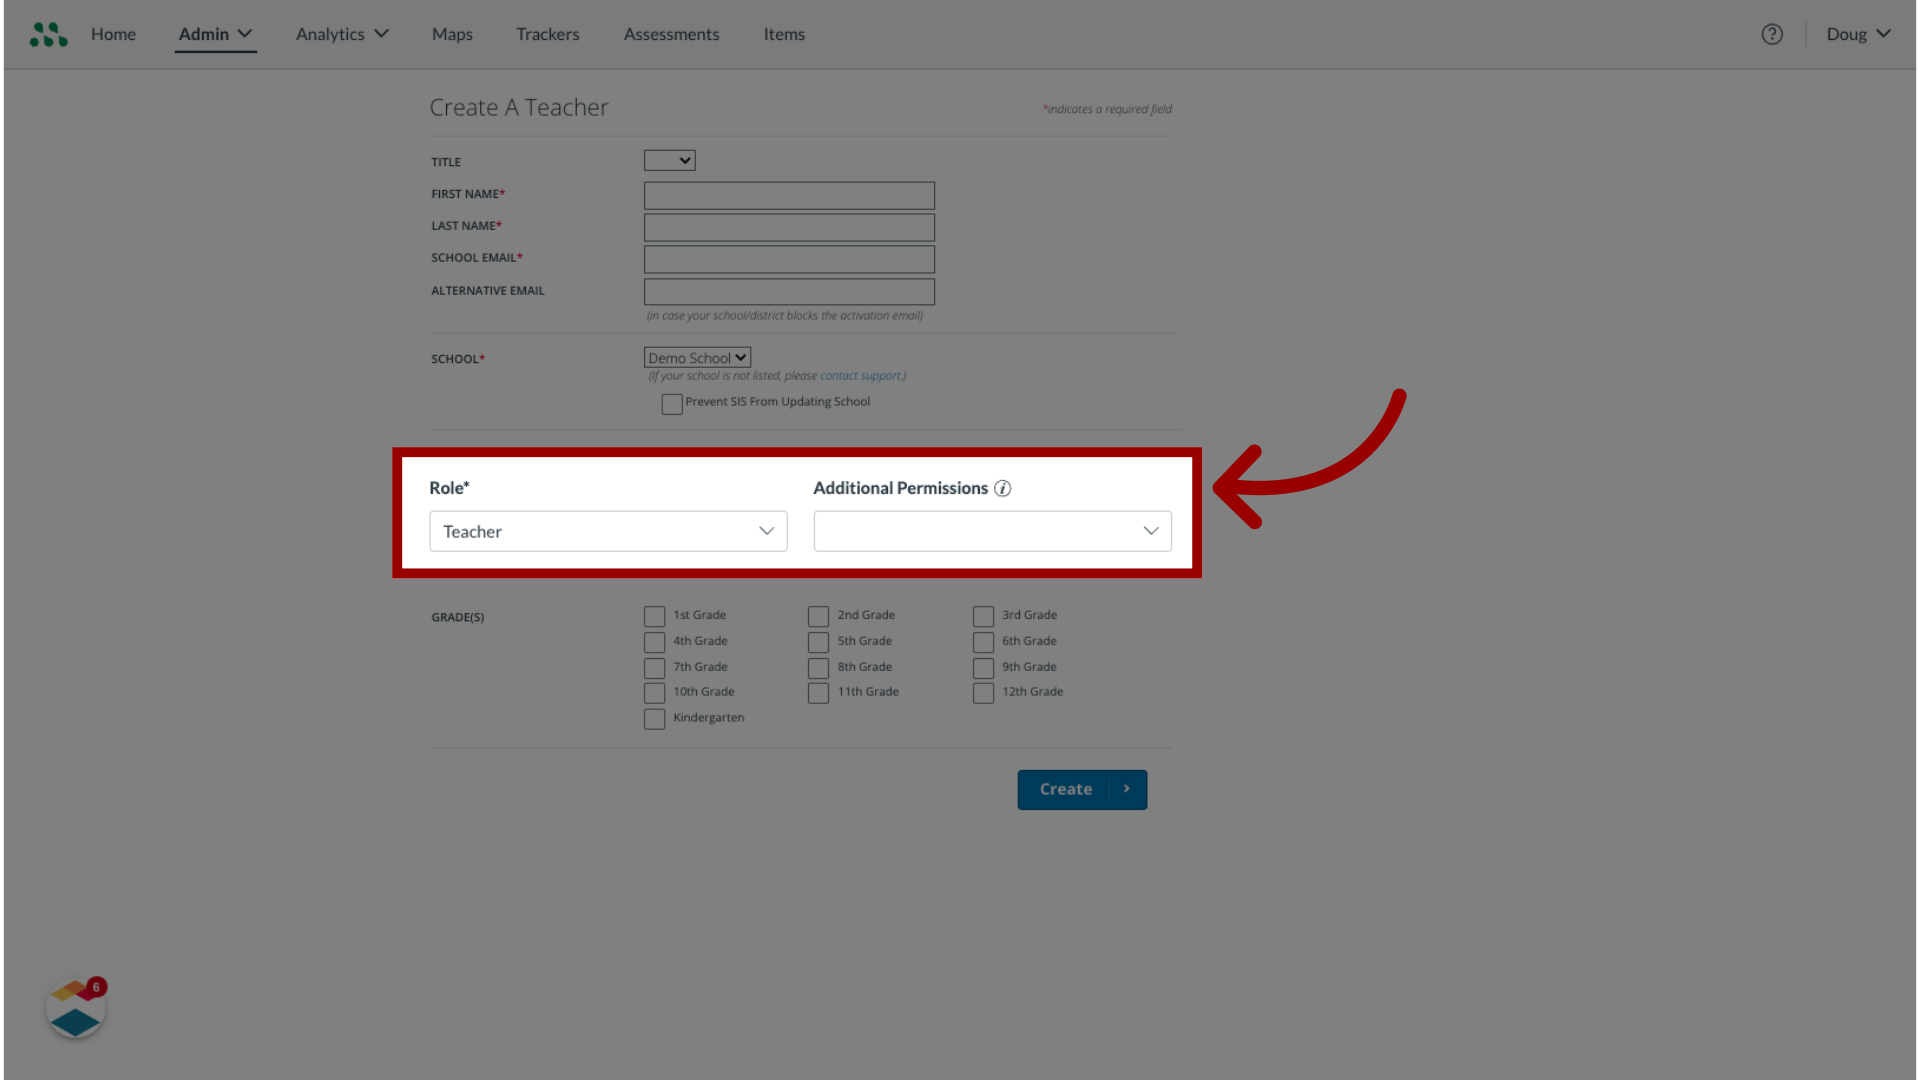
6. Select Role and Permissions
You must assign the user a standard role permission. A user's role permission determines their access and permissions in Mastery Connect. You can also assign the user one permission in addition to those associated with their assigned standard role. To assign the user a role, click the Role drop-down menu. To assign an additional permission role, click the Additional Permissions drop-down menu.
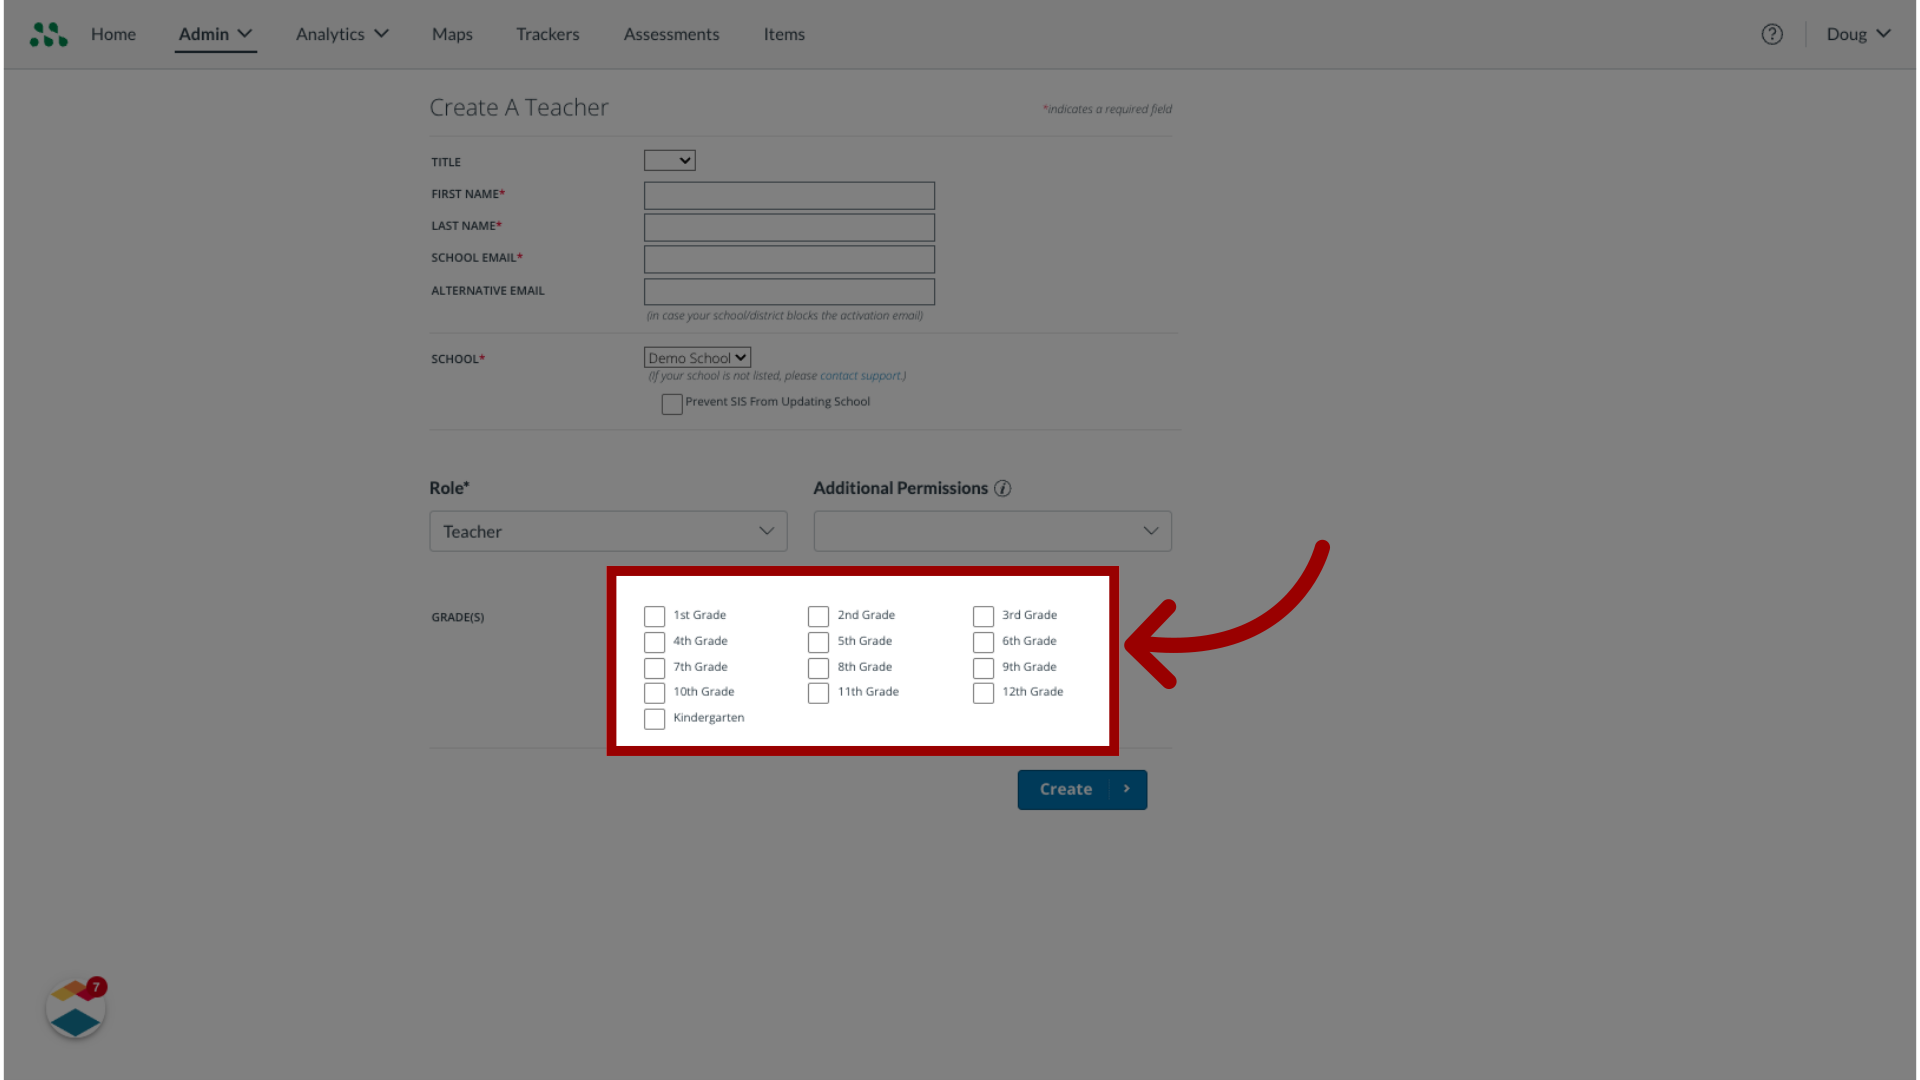
7. Select Grade(s)
To associate the user with one or more grades, click the checkbox next to the grade level or levels.
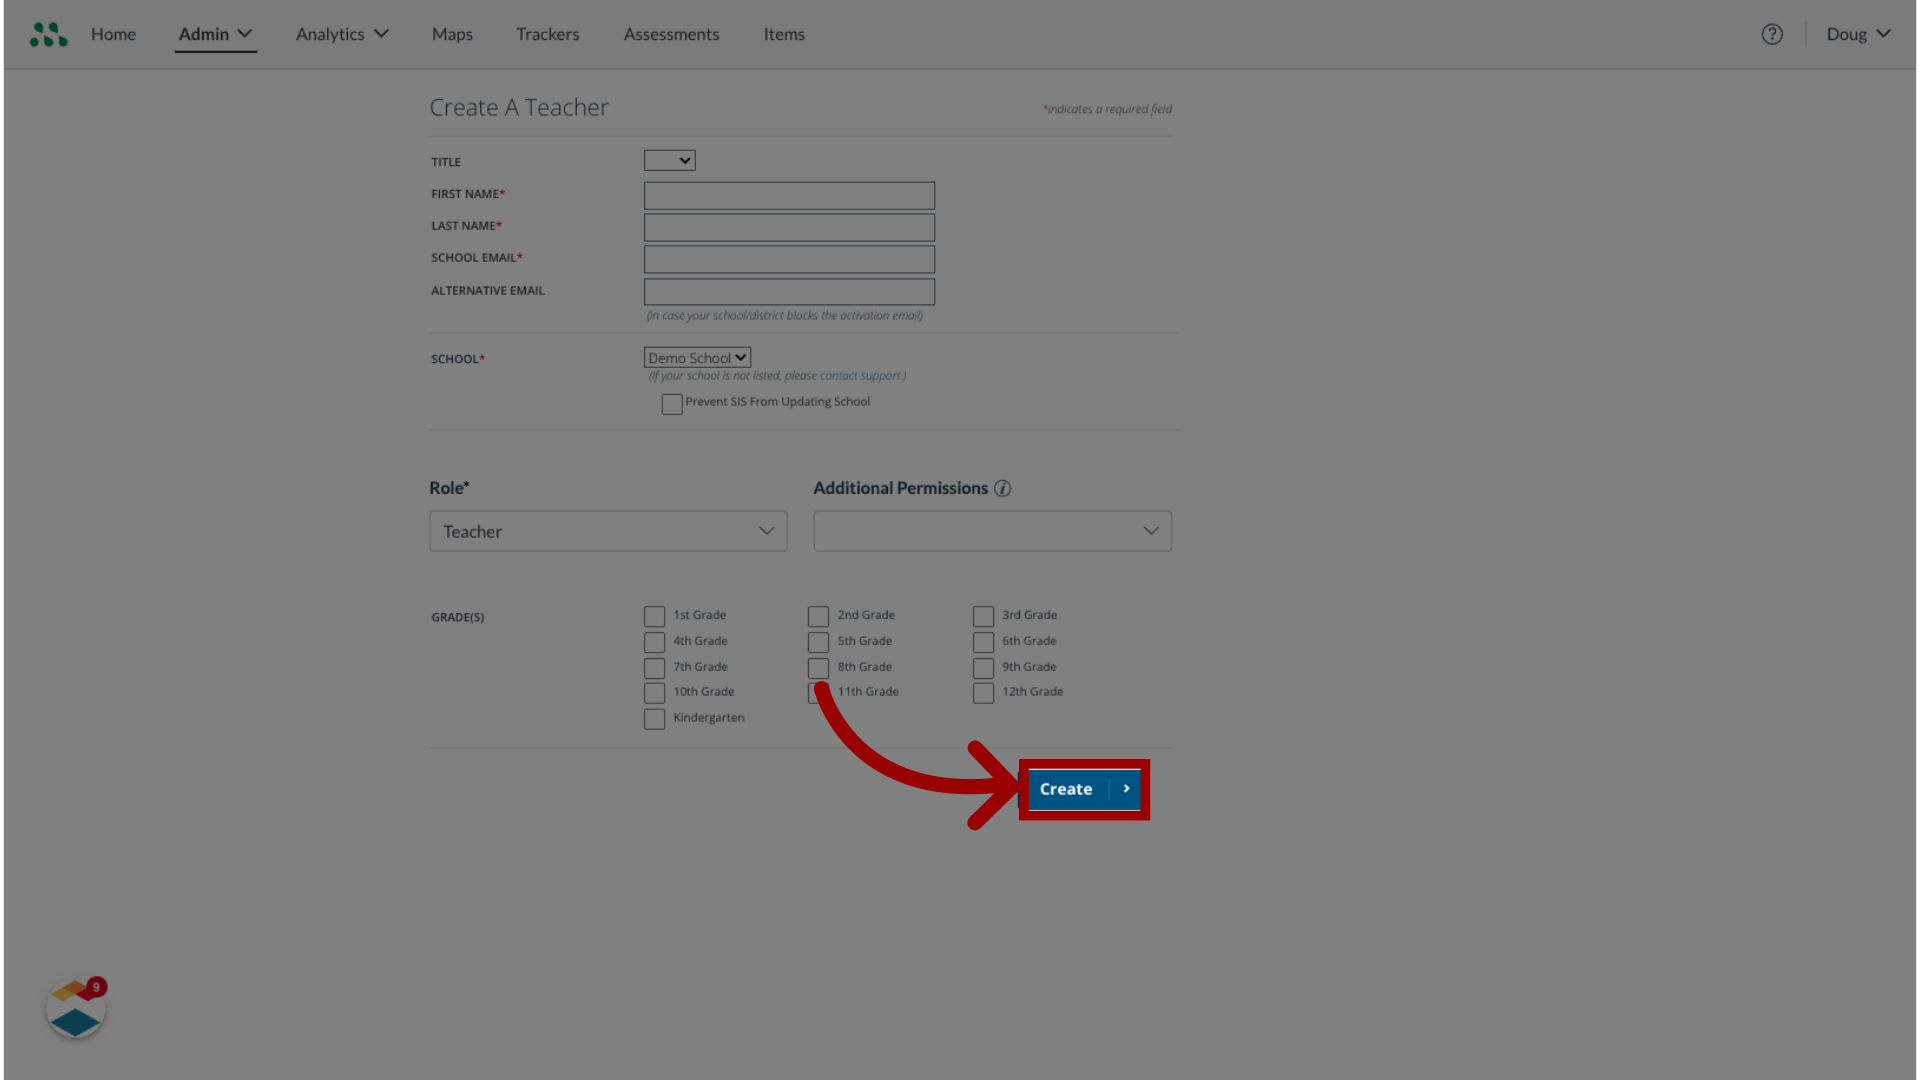
8. Create Account
To create the account and send an activation email to the user, click the Create button.
This guide covered how to add a staff account as a Mastery Connect admin.
